| Excerpt | ||
|---|---|---|
The User Access screen is where we control which:
It also enables us to see exactly what the user has access to as a result of such configuration. Example In the following screenshot, we can see that the selected user doesn’t have any categories assigned (the number in blue) to them but that they have been assigned to the Role of Dashboard User which has 3 categories assigned to it. 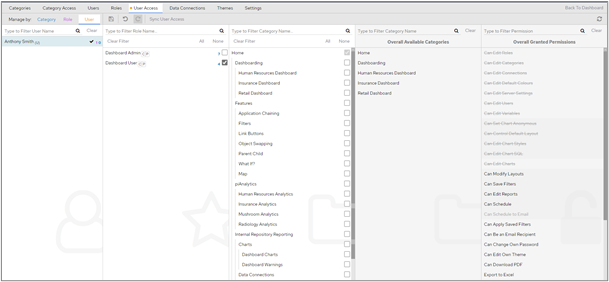 a role (number in pink).  There are three options in this panel. Category, Role and User.   These different views will allow you to view by:
Manage by UserOn start-up you will see a blank section on the right and the user panel on the left, to start assigning categories to users you need to select a user to change. As you can see from the screen shot the selected user currently has no categories assigned to them and therefore, they wouldn’t see anything if they were to log into the dashboard. 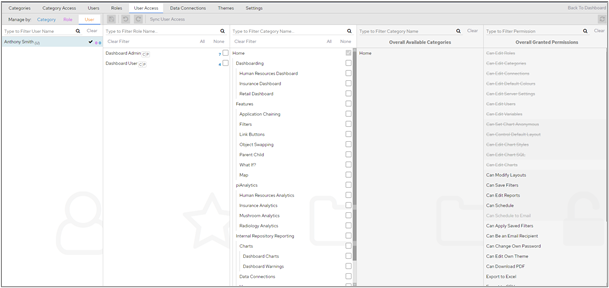 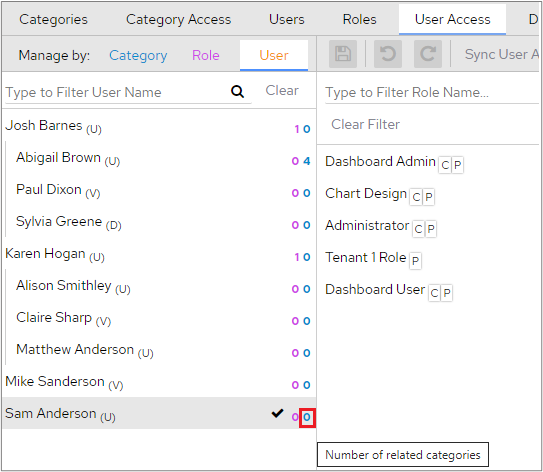 To assign categories to the selected user, tick each category that you want to give them access to.  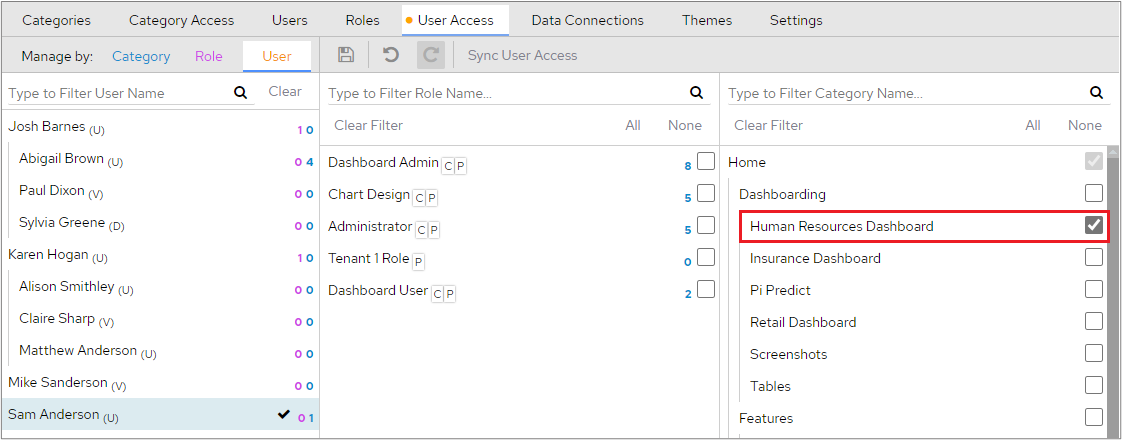 If you see a red exclamation mark next to the selected category, it means that you’ve selected a child category without selecting its parent as well. This will prevent the user from seeing that selected category until you have added the parent category, in this case ‘Dashboarding’.   Once we have added the ‘Dashboarding’ parent category the exclamation mark disappears, and the user will then be able to see the Human Resources Dashboard when they log in. When you’ve selected all categories that you want the user to have access to, click the ‘Save’ icon at the top of the screen. 
Manage by RoleA Role can be created with varied privileges, which can then be assigned en masse to users to give each user the same privileges and can also be used in the same way to assign categories en masse to users. Click on a Role on the left-hand side of the screen. The number in blue indicates the number of categories that this role can see and the number in orange indicates how many users are assigned to the role.  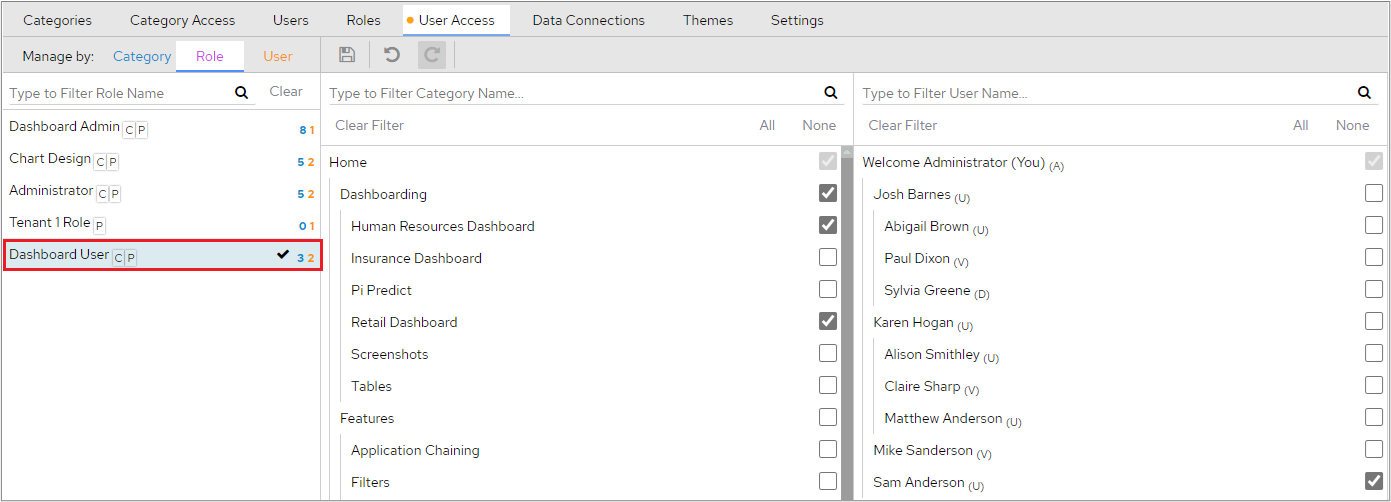 The Dashboard User role has one user assigned to it. This means that this user can access every category that is assigned to this role, as shown in the middle column. From this screen we can then add more users to this role, or we can add/ remove categories that we do not wish them to see. Manage by CategoryThis shows the breakdown of who has access to this specific category based on role access and specific user access and then collates this information to provide you with a list of users who have access to the selected category. Example In the following example, we can see that 3 people have access to the ‘Retail Dashboard’ category. Anthony and Paulo have access because they have been assigned the Dashboard User role, which has access there are 3 roles assigned to this category and Janine has access because it was assigned to her at User level.  (number in purple) and 2 related users (number in orange). 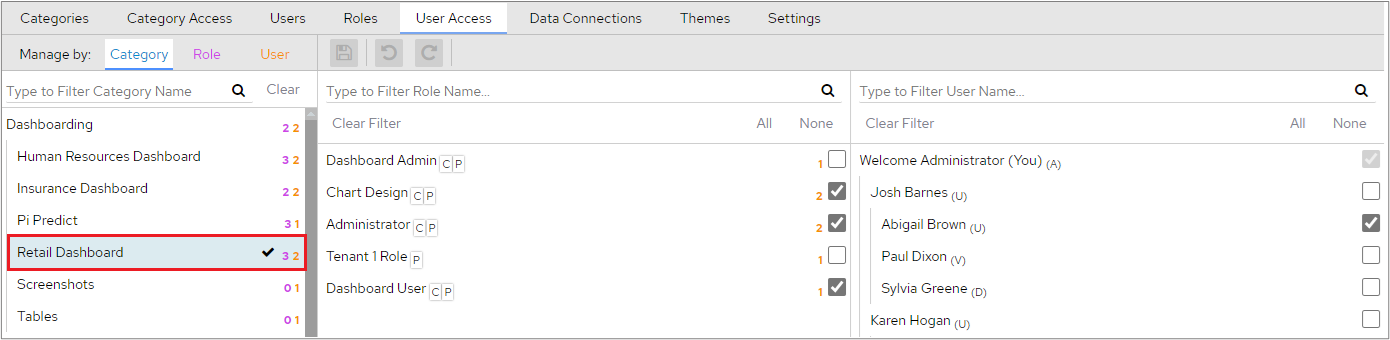 |
Page Comparison
Manage space
Manage content
Integrations